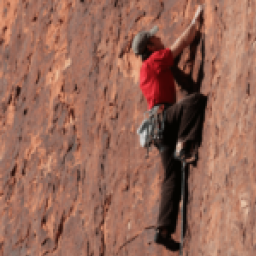
Climbing involves a lot more than simply ascending. Once you’re at the cliff’s peak, you’ll need a way to return to the ground.
Rappelling, otherwise called abseiling, is a handy technique used to descend to the ground using rope and other gear. Even though lowering off or walking down might sound like a good idea, rappelling skills are vital for all climbers.
At times, rappelling is the only way to descend a given terrain; thus, it is critical to learn how to rappel. All the same, it is also among the riskiest activities you can undertake.
Most climbing injuries and even deaths have happened due to mistakes when rappelling. We recommend you use this guide as a beginning point to quench your thirst for knowledge and learn how to rappel safely.
Rappelling and rock climbing are risky. It would be best if you knew and did them with the assistance of a professional guide, especially in the beginning.
This guide covers everything from what rappelling is and how it has evolved to how to rappel and the types of rappelling. Besides, this information will come in handy for beginners and professionals. So, without further ado, let’s delve into the guide.
What is Rappelling?
Rappelling is descending using a long rope in a controlled way. This technique lets you lower yourself on steep routes with controlled speed and maximum safety. Plus, it comes in handy when mountaineering, canyoneering, rock climbing, water rappelling, and all other types of rappelling.
Besides, rappelling can be an independent activity if you’re searching for a fun and safe way to discover the outdoors. The primary benefit of rappelling is that it facilitates safe descent down different terrain.
Even though there are other techniques to lower yourself from terrains, they have downsides, including being riskier than rappelling or needing a partner. Rappelling lets you descend alone and in a controlled and safe way.
The Progression of Rappelling
While the initial purpose of rappelling was associated with descending a mountain or cliff safely, with time, it has advanced into a skill utilized for different activities. For example, canyoneers can descend into a canyon slot, and spelunkers can lower into vertical caves by rappelling.
Moreover, it has grown into an independent activity, with the most adventurous people rappelling for its fun. Again, the military uses this technique for swift access to tricky places that might be otherwise challenging.
You can apply several rappelling techniques, though the conventional methods include lowering yourself down a terrain, feet first while looking at the wall. As you descend, you gradually release the rope, letting you safely lower yourself in a strategic and controlled manner.
Every so often, you can use your legs to push off from the cliff, facilitating descent at a swift but controlled rate. This also comes in handy when jumping over exposed chasms on a rock surface, where maintaining your legs on the wall may not be possible or reasonable.
Some rappelling techniques include descending with your face down or not even facing the wall. These techniques are more suitable for professional climbers with a lot of experience and advanced rappelling skills and not for beginners.
To be a professional abseiler, you have to train for months or years under the supervision of an expert. Although rappelling is an effective and handy descending technique for lowering yourself on a vertical surface, it can be perilous when executed wrongly.
Is there a Difference between rappelling vs. being lowered?
Being lowered by a climbing partner is the most preferred alternative to abseiling in the climbing gym. On the other hand, this will only work when one climber makes it to the ground; thus, not applicable in every circumstance. What’s more, this technique calls for a partner, while rappelling doesn’t.
Is there a Difference between rappelling vs. down-climbing?
Another possible substitute for rappelling is down climbing if the route allows it. This method is more dangerous since you’re unceasingly susceptible to falling. Besides, rappelling is not as time-consuming as down climbing.
How to Rappel: Comprehensive, Step-by-Step Instructions
As promised, here is the guide on how to rappel. First, let’s see the equipment you’ll require for rappelling.
Typically, you’ll need three devices to rappel successfully. We will review them in detail and see how they work together to ensure a safe descent.
To better understand how a rappel functions, it would be best to picture yourself at the cliff’s peak; you have the three pieces of essential rappelling gear in your pack.
What do you do next?
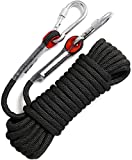
- Prepare a rope. The first essential gear in your pack is the rope. It connects to the anchor point at the cliff’s peak. The anchor could be a previously drilled rappel ring, or you might need to create one. The rope should be long enough to cover the entire cliff’s length, as you’ll be using it to rappel to the ground. For rappelling, choose a static rope.
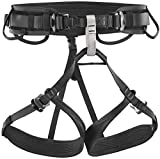
- Use a rappelling harness. The harness is the second gear, and you should wear it on your waist and legs. It comes in handy in holding you in position when you’re hanging in the air as you descend.
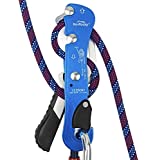
- A belay or rappel device. Lastly is the rappel device. It connects to the rope to generate friction, but the precise technique varies depending on the gadget. This device also connects to the harness, thus attaching you to the rope adequately.
| Preview | Product | Rating | |
|---|---|---|---|

|
GM CLIMBING Rappel Ring 25kN for Rock Climbing Arborist Rescue Slackline Hammock Large Gold Pack of... | 376 Reviews | Check Current Price |
|
GINEE Outdoor 16mm Static Rock Climbing Rope 35FT Black Safety Ropes Arborist Tree Climbing Rescue... | 1,221 Reviews | Check Current Price |

|
Petzl CORDEX Gloves - Lightweight, Breathable Leather Belay Gloves for Climbing and Rappelling - Tan... | 675 Reviews | Check Current Price |
|
PETZL – Aspic Harness | 26 Reviews | Check Current Price |
|
Ito Rocky Climbing Stop Descender Rappelling Anti-Panic Belay Devices for 9-12mm Rope Rescue... | 314 Reviews | Check Current Price |
Last update on 2023-01-03 // Source: Amazon Affiliates
Related Article: 7 Ways to Set up a Top Rope Anchor
How to Rappel Quich Sum Up
The rope hangs to the ground and establishes a way down.
The rappel device (some call it a rappel gadget) connects to the rope and lets you regulate its speed as you feed it through your hands while descending, thus controlling the speed at which you’re lowering. You will connect the harness to the rappel device. Then connect the harness to your waist and legs, after which you’ll be ready to start descending.
If it seems difficult, you can always imagine the rope as the road, as it establishes a path from top to bottom. The rappelling gadget can be the vehicle, as it regulates the speed on the road. Lastly, the harness is the seat belt since it offers safety in the vehicle; thus, you’ll arrive at your destination, the ground, safely.
After covering all the essentials needed for a successful rappel and how they work together, it only makes sense that we cover how to rappel and what it involves.
Use the Following Steps to Rappel:
This is a multi-step guide on the entire rappelling process.
- Attach yourself to the anchors with a daisy chain or PAS (personal anchor system).
- Make an overhand loop in the rope and secure it to the harness using a carabiner.
- Wind one of the rope’s ends via the rappel rings.
- Haul it until the rope’s middle is centered between both rappel rings.
- Make a stopper loop on both rope’s ends.
- Connect the belay gadget to your rope.
- Connect the belay gadget to the harness with a lockable carabiner.
- Undo the overhand knot.
- Throw your rope to the ground.
- Check to ensure both rope ends reach the ground.
- Make a backup loop, klemheist, or prusik knots, and fasten it to the harness.
- Weight the rope with the PAS still connected.
Next, double-check to ensure the following steps are in place.
- The carabiner is locked.
- The rope is properly aligned.
- Both rope ends are at the bottom of the cliff.
- The backup loop is fastened to the harness.
- You tied the stopper loops.
After checking the steps above and everything is safe, proceed with the steps listed below.
- Unfasten yourself from the anchor points.
- Gradually release friction in the gadget till you begin moving.
- Descend slowly to the bottom.
- Detach the rappel gadget from your rope.
- Undo the backup knot.
- Undo the two stopper knots as well.
- Haul the rope with one end.
Believe it or not, you’re done. That’s how you execute a proper rappel and get down safely from a climb.
Note: These instructions are for a single-pitch, double strap abseil, one of the most popular and easiest abseils to execute. Different circumstances will call for marginal tweaks to some of the steps.
How Does Rappelling Work?
Rappelling is a dangerous yet thrilling part of climbing. But how does rappelling work? It is essential to learn to rappel appropriately because this is when a significant share of climbing accidents occurs.
1) Double-check Your Equipment
As a climber, you simply require several additions to the necessary gear to rappel. Here are the steps you need to start rappelling.
- An anchor that should be connected to the harness using a girth hitch via the tie-in positions.
- A belay device that you’re supposed to make sure is approved for rappelling. Try all figure-8 or tubular-design gadgets.
- A cord of up to 3 feet, about 5 mm thick, for the rappel tool’s auto-block hitch. Tie a double knot on the cord inside a loop.
- If you look to rappel multiple times, don’t forget to carry your gloves.
2) Fix the Ropes
At the route’s top, set the rope up for safety. Fasten a quickdraw to a safe point at the top and fasten your rope inside the draw. Clip a loop on the same point as the quickdraw using a locking carabiner on the anchor system.
Place another loop in the anchor mechanism, eliminating the system’s slack to another reliable point at the top of the route. Clear the top anchor and then rack it.
Utilizing a clove hitch, tie the slack off, and fasten it to the belay loop to stop a misstep from causing the rope to drop you unexpectedly. Untie the belay device and push the rope through both the bottom links of the two chains. Read our detailed guide on how to rappel with a belay device.
Set up a stopper knot in the rope’s end to close the rappelling system. There is supposed to be a stopper knot on the ground end of the rope, and together these two knots can stop the climber from rappelling off both rope ends.
Push the rope till it reaches the clove hitch, and continue pushing it till the center mark hits the rappel`s top.
3) Establish the Rappel
You are supposed to be clipped in your anchor system and untied from your rope for this step. Utilize a locking carabiner to fasten the rappel gadget onto the belay loop. Then pull a few feet of both ropes.
Set up two little bights in every strand of rope and feed them through the rappel’s device (learn how is belay device made) openings. Fasten the carabiner via the gadget and both rope strands, and lock the carabiner.
Pull the brake strands via the rappel tool as much as possible. Check everything and launch an auto-block by covering the cord’s loop around the two rope strands beneath the belay mechanism. This will prevent you from falling in case you mishandle the rope.
4) Start Descending
Now, it’s time to start descending toward the ground. Completely sit in the harness with your legs straight and your hips positioned at a 90-degree angle. Start pushing out from the wall. Focus on the setting and keep your feet flexible.
Finally, check everything once more, and if everything is okay, begin descending. Have one arm on the brake strands and untie any tether linking to your anchor. Keep the other arm on the auto-block, on the other rope’s brake side.
Utilize your lower arm to push the rope up via the belay equipment as the top arm motions the auto-block down the rope to avoid tightening. Next to the anchor, disconnect the belay device.
While rappelling might be dangerous, rappelling is a thrilling sport as well. However, be careful of the external factors that can harm you if you do not take the correct safety measures.
When Do You Use Rappelling?
So, when will you need to rappel? There are several instances where you will require the skills of knowing how to rappel.
Rappelling when Rock Climbing
As a climber, you’ll have to rappel all the time. When you reach the peak of a cliff, you typically have three options: walk off, get lowered, or rappel. If walking off the cliff or terrain is not possible, you will have to choose between getting lowered and rappelling.
Choosing between these two is not an easy task, and all climbers have their opinions on what they think is right. On single-pitch adventures, it’s frequently easier to get lowered by a partner who has better rappelling skills than you.
On the other hand, setting up a rappel might be the best choice on multi-pitch ventures, as being lowered isn’t practical. Here, there are always pre-placed rappel locations, particularly when sport climbing—all the same, when trad climbing, you’ll have to establish an anchor.
Rappelling when Mountaineering
Like rock climbing, rappelling when mountaineering occurs when descending, after summiting the mountain, or when you get tired.
The main difference is that numerous alpine terrains don’t have pre-set anchor points to execute a descent. Hence, the rappelling process becomes much harder. Again, you might have to deal with ice and snow as your lower.
Rappelling when Canyoneering
One of the most important things you’ll do when canyoneering is rappelling. When lowering from a canyon, you will most certainly find yourself in a situation where the ground is low enough to require rappelling. You’ll need to be cautious to land on the cave’s bottom safely.
Occasionally, there are pre-set bolts on the walls to rappel easily, though sometimes you might require establishing your own.
Rappelling while canyoneering is typically more demanding than average rappelling. Here, you’ll have to deal with natural hazards such as rapids, wet rocks, waterfall rappelling, and other extreme conditions.
Before embarking on your canyoneering adventure, ensure you have ample experience in different rappel types and suitable rappelling skills. Ensure you have adequate gear, like a canyoneering rappel gadget and a suitable rope.
Rappelling when Caving
Compared to rappelling while canyoneering, rappelling in caves is relatively straightforward. Here you’ll require to descend through parts of the cave that are impossible to walk down. You’ll have to tie your rope to pre-set or temporary anchors or natural features.
While you’re not likely to come across waterfalls as you lower, caving rappels have their unique set of difficulties.
For instance, they tend to be extremely dark, making it tricky to see. Again, the rock might be wet and slippery due to condensation inside the cave.
Lastly, your rope might get muddy, making it challenging to control your descent. Hence, when rappelling in caves, it would be best to have specialized gear.
Can Rappelling be Used as a Stand-Alone Activity?
Perhaps you’re not a fan of rock climbing, mountaineering, canyoneering, or caving but still want to experience the thrill of rappelling.
You can take up rappelling as an independent activity. This way, you’ll experience the outdoors from a different perspective.
Many tourist destinations, including Florida, Cancun, Maui, Kauai, Hocking Hills, Zion National Park, Puerto Rico, and Costa Rica, have rappelling tours; you can visit pre-established areas with experienced touring firms. The firms will provide the necessary gear to execute your rappel and guides to assist you.
You’ll have to execute multiple rappels during a single trip most of the time. The touring firm may also add in swimming, picnics, and hiking in pleasant areas to spice things up.
Besides, a tour firm will offer a more secure and comfortable experience allowing you to improve your rappelling skills and have fun in some of the most scenic areas.
What Are the Different Rappelling Techniques?
Having reviewed the different circumstances you might require to rappel and how to rappel, let’s now look at the different types of rappelling you might use. While there are seven types of rappelling, here we will focus on the four main techniques.
Double strands rappels
This is the most straightforward rappelling technique. You’ll need two parallel ropes where your belay gadget will pass through here. Then, you’ll grip both ropes simultaneously as you descend to the bottom with your chest and face facing up.
This technique presents several upsides. For instance, it lets you pull your rope comfortably once you reach the ground since both rope strands will be wound via the anchors. This simply means that there are no knots, thus making it even safer. Both ropes are easier to hold, making the rappel easier to execute.
The only downside with this rappelling technique is that not all rappelling gadgets can be used to execute it. Devices such as the Petzl GriGri are designed to fit a single rope strand; therefore, you won’t be able to execute a double-strand abseil with it.
Furthermore, the double-strand technique reduces the distance you can lower by half; hence, this might not be the go-to option for lengthier distances.
- SEAMLESS FORGING: GM CLIMBING aluminum rappel ring forged by seamless technique is of solid construction with rating to 25kN / 5600lb breaking strength.
- 360 ALL-ROUND: Beautifully round shape gives the ring strength to withstand forces from all directions. You will no longer worry about improper loading direction.
- SMOOTH ROPE PULL: Ring's thick radius avoids stuck ropes while pulling. Small Ring-11.5mm; Large Ring-12mm.
Last update on 2023-01-21 // Source: Amazon Affiliates
Single strand rappel
As the name suggests, a single strand abseil is like the double-strand technique. Apart from using one rope, you’ll feed through the belay device. This method of rappelling will generate less friction in the mechanism, making the rappel more challenging to control.
The single-strand abseil comes with several advantages: you can utilize any belay or rappel device on the market to execute it; thus, you’ll never be stuck due to a lack of a way of descending. Besides, it lets you spread your rope’s length twice, as you don’t need to double-thread it via the anchors.
On the other hand, there are some disadvantages to using this method, like it’s more difficult to fasten the rope to the anchor making it harder to retain once you get to the ground.
But, to avoid this, you’ll have to utilize the blocking method or execute a tagline rappel. These two methods surge the chances of the rope loosening from the anchor.
Australian rappel
The other commonly used rappelling technique is the Australian rappel. This is the technique where you lower yourself with your face pointing towards the bottom, rope tied to the waist, and legs against the route you’re abseiling on.
This technique lets you descend faster compared to a standard rappel. Hence, if you plan to run against the terrain as you descend, feeding the rope through your hands as fast as possible, this is the technique to use.
There are a few ways you can go about executing an Australian abseil. For instance, you can connect the belay gadget normally and turn around with your feet and core to keep you in position. Again, you can put on your harness backward.
Doing this makes you more susceptible to an injury on your back, and it will unnecessarily strain your gear. These disadvantages are why most climbers don’t like this method.
In a sport that already presents a handful of risks, climbers make an effort to avoid danger as much as possible, and this rappelling technique doesn’t seem to be safer than other rappelling methods.
Nevertheless, performing an Australian rappel will get you there if you’re confident in your rappelling skills and are looking for a thrilling challenge. Again, it will come in handy whenever you want to lower yourself swiftly.
Simul-rappels
Simul-rappels are dangerous, technical, hard to perform, and are more suitable for professional climbers as they have better rappelling skills. It is useful when attempting to swiftly lower from a multi-pitch terrain.
In this method, you will tie the rope the same way as a regular double-strand abseil, but the difference will be that you’ll fasten the rappel gadget to a single strand.
Then your climbing partner will attach themselves to the other rope strand. You will lower together, each seeking to counterbalance the other, allowing the system to remain balanced.
This technique lets you and your partner lower simultaneously, therefore saving time. You won’t have to spend a lot of time connected awkwardly to the anchors.
Nonetheless, these upsides come at a cost. If you or your partner blunder, the outcome can substantially negatively impact the other climber.
This was clear after the recent demise of Brad Gobright, who dropped from a simul abseil after his mate forgot to make a stopper knot, and he unexpectedly rappelled off the rope end to the ground.
Simul abseils will certainly save time and are more straightforward than establishing a blocking. Before attempting simul-rappels, always ensure that you and your partner have the appropriate rappelling skills under your belt.
Can You Rappel Without a Device?
Yes, you can rappel without a device. While rappelling without a device is recommended for professionals only, you might be in a difficult position and need to rappel without a device.
When mountaineering was a new sport, climbers were trying to characterize it; by trying out different things to see which one worked best, including rappelling without a device.
Rather than utilizing a harness and rappelling device, mountaineers tied the rope around their bodies, a technique that generated friction and got them to the ground safely. But to be fair, there were no rappelling devices and harnesses during that time.
The Dulfersitz rappelling technique allows you to lower yourself without a device, and it is still relatively common among climbers. Also, if performed correctly, it will get you to the ground safely.
It involves placing the rope across your thighs, wrapping it around the legs, and looping it through your chest. It lets you descend as you remain securely tied to the rope. However, it will be somewhat uncomfortable as it generates plenty of friction against your body.
What Gear Do You Need to Rappel?
So, what will you require to get to the ground safely? As mentioned above, there are three crucial pieces of rappeling equipment you’ll need.
- A rappel or belay device
- A harness
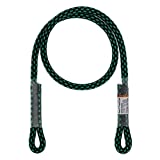
- A rope
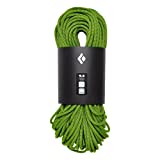
A rope
The market is flooded with useful climbing ropes, though the most suitable rappelling rope depends on the activity you’re partaking in. Climbing ropes are typically sturdy enough to carry a climber`s weight and will probably be compatible with your rappelling gadget.
All the same, you should know some specifics. For instance, static ropes are more suitable for rappelling than dynamic ropes. Static ropes won’t overstretch, allowing you to regulate your speed while lowering effortlessly. Again, they are more affordable than dynamic ropes.
- Static Ropes,Length 35FT,50FT,100FT,150FT,200FT,250FT (Diam 10mm,16mm)
- 2 Plastic Protection ring,2 Buttonholes,1 High strength rope
- Material:High Strength Polyester(Multi-core multilayer structure)
Last update on 2023-01-03 // Source: Amazon Affiliates
That said, some situations call for rappelling using a dynamic rope. For example, if you`re lowering from a sports climb, you`ll need first to belay your climbing partner using the dynamic rope, then lower yourself with it.
For this reason, it would be best to practice lowering using a dynamic rope to be familiar with how it works.
Something else to consider is whether the environment you’re rappelling is wet. When canyoneering or caving, you’ll most likely get your rope wet as you rappel. So, you`ll have to carry a dry-treated rope, especially if you`ll be using it in wet surroundings for a long.
- Excellent protection without hindering activity
- Purpose designed and built
- Cutting-edge climbing equipment is designed and built for the send across the full spectrum of climbing pursuits
Last update on 2023-01-03 // Source: Amazon Affiliates
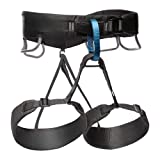
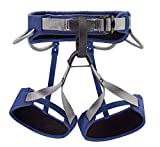
A harness
Comfort and safety are the primary considerations when choosing a harness, particularly if you`ll be using it the whole day. The most comfortable harness will vary from climber to climber, but here are a few pointers listed below.
- Buy a more expensive harness, as most cheap ones are usually less comfortable.
- Don’t choose a harness that’s too lightweight. Typically, they are better suited for alpinists, as they`re designed to be worn over plenty of clothing. Besides, comfort is not a priority for these types of harnesses.
- Check your clothing, as the clothes you wear on your legs will impact the comfort your harness will offer. For instance, if you try out your harness wearing thick trousers and go climbing in shorts, you might feel rather uncomfortable.
Nevertheless, purchasing a harness will mostly depend on your preferences. Most climbers go for standard harnesses (sit in harness), though if you want additional security or are rappelling with children, you can go for a chest harness since it’s more comfortable.
- Pre-threaded speed adjust waistbelt is safer and allows easier adjustments
- Four pressure-molded gear loops
- Adjustable rear elastic riser
- LEGENDARY PETZL QUALITY: An affordable harness for beginner to intermediate climbers, the CORAX LT draws on Petzl’s years of expertise and reliability to leverage the same thoughtful design, high-quality materials, and refined craftsmanship that expert climbers find in from our most advanced harnesses.
- BUILT BETTER: Petzl’s FRAME technology pairs a time-tested design with superior modern materials, making the CORAX LT one of the most durable and comfortable harnesses in its class with performance EVA providing support for its entire lifespan.
- READY FOR ANYTHING: Designed for great performance from gym climbing to trad multipitch and ice climbing; two rigid gear loops in the front are angled to easily rack and access gear, and two roomy, flexible gear loops in the rear stay low and out of the way of a backpack.
Last update on 2023-01-03 // Source: Amazon Affiliates
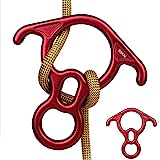
A rappel or belay device
The next thing is choosing a reliable rappel or belay device. Most belay gadgets are ideal for rappelling, though, for more demanding ventures, it would be best to purchase a rappelling-specific device.
- Keep Your Safety: It uses the friction between the rope and the Descender device to slow down the descent or brake. Extra thick with ears and belay slot will keep your safety, even in a rescue or emergency situation.
- Superior Braking Resistance: Breaking strength 11,000 lbf (50KN/5000kg). Allows for smooth rope action while descending or belaying, offers superb control on rope.
- Figure 8 Descender: Big Wall Climbings Terminal 8 with Ears is an improvement over standard figure 8 devices with improved breaking and safety features.
Last update on 2023-01-28 // Source: Amazon Affiliates
All the same, in some situations, you’ll have to go with what you have. For example, if you ascend a multi-pitch route using a gri-gri, you can either utilize the gri-gri to abseil or use a secondary device. Likewise, if you`re rappelling for fun, you might consider picking a more expensive device.
For more demanding rappelling adventures like caving, it would be best to take the time to find a reliable belay device. Some devices offer automatic braking, while others let you add extra friction as you rappel.
Other Rappelling Gear You Will Need
Besides these three items, here are some of the other gear you should carry with you when rappelling.
A rappelling helmet
While a helmet is not required all the time when rappelling, it would be best if you always carried it. It comes in handy in shielding you from mishaps, rockfalls, and other injuries.
That said, any climbing helmet is suitable for rappelling and will serve you just right. On the other hand, other types of helmets, such as bike helmets or ski helmets, might not be designed to absorb the impact you require to shield yourself against.
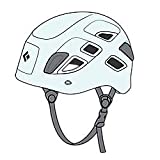
- The Black Diamond Half Dome rock climbing helmet has long been a staple for climbers worldwide. The simple yet highly effective design and construction make it a easy choice for safety helmets.
- Made with a durable ABS outer shell material for impact protection and EPS impact foam for shock absorbsion, this helmets meets climbing safety standards.
- The easily adjustable chin strap and lower profile suspension system with a one-handed fit dial make fitting simple and secure.
Last update on 2023-01-03 // Source: Amazon Affiliates
Clothes suitable for rappelling
Choosing the right attire will impact your comfort when rappelling. The best way to have a good time rappelling is to choose practical and comfortable clothes.
They should facilitate movement but shouldn’t be too loose to be an obstacle. Other variables to consider are weather resistance and protection from the sun.
Miscellaneous Rappelling Gear
While miscellaneous gear sounds like too much, it will come in handy in making the activity safer and easier. Here is a list of the miscellaneous rappelling gear you should carry.
- A knife
- Paracord
- A backpack for carrying your gear, and extras like food, water, and sunscreen
- A Personal Anchoring System (PAS)
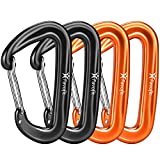
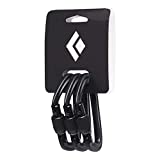
- Extra carabiners; one non-locking and four lockable
How to Learn to Rappel?
Now that we’ve covered how to rappel, what you need to rappel, the methods to use, and the gear you’ll have to carry, we`ll talk about how to learn to rappel before we delve into the FAQs.
You should use this guide as a beginning point; hence, don’t rely on it as the only source of information. Similarly, don’t use it as an alternative for practicing, as it could have dire consequences.
When learning how to rappel, the first thing to do is find a safe environment to practice and have an experienced instructor.
The best practicing environment minimizes risks in case of any mishaps. This could be flat ground, your local climbing gym, or establishing a top-rope reinforcement mechanism to remain safe if you make a mistake.
Having someone with better rappelling skills allows you to learn from them and is more recommended than following a guide on how to rappel without practicing.
Whether it’s the instructor from your climbing gym or any other professional climber, ensure they can explain and help you practice and learn how to rappel.
How to Rappel General FAQs
Should I rappel from a pre-established anchor on a tree?
When on your adventure, you might see a tree with a pre-set anchor. However, don’t begin setting up your rappel just yet. You have to check whether the anchor is strong enough to hold. Besides, the tree could be weak due to the number of climbers who might have used it.
Constant abseiling by other climbers could injure the tree, hence, assess the trunk by looking to see whether it has deep cuts or grooves caused by climbing ropes. Before proceeding, you may want to read our guide ot how to rappel from a tree.
If it doesn’t have these cuts, disconnect the runners, if possible, and set up yours. While the runners on the tree might look new, they might have been on the tree for a long time and, therefore, might not be reliable. Moreover, exposure to the weather and its elements could impact the webbing’s strength.
What is the best footwear to wear when rappelling?
When rappelling off a cliff, it would be best to wear hiking boots or approach shoes. On the other hand, when waterfall abseiling, you should wear hiking boots, strap-on sandals, water shoes, or sneakers.
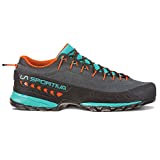
- A comfortable and durable womens hiking shoe designed for long approaches on rugged terrain, the La Sportiva Womens TX4 offers excellent support and traction with leather durability.
- The leather upper material increases abrasion resistance, foot protection and stability. Leather looks good both on and off the trail. Full surround rubber rand protects the lower foot from sharp trail hazards.
- True to size length with a wide forefoot fit for all day comfort and stability.
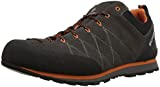
- For Every Approach | SCARPA’s most versatile approach shoe, ready for everything from granite slab scrambles to steep descents in rocky terrain.
- Vibram Megagrip Outsole | Responsive, high-performance rubber for confidence-inspiring grip on rock or dirt.
- Durability and Protection | The suede upper withstands abrasion while the rubber toe rand keeps your feet safe from big boulders.
Last update on 2023-01-03 // Source: Amazon Affiliates
What else should I wear when rappelling?
Wear synthetic fabric as it will quickly dry off compared to cotton. So go for attire made of techwick and polyester. When waterfall abseiling, wear sneakers, hiking boots, strap-on sandals, or water shoes.
Again, you’ll want to bring a dry shirt and towel to dry yourself once you’re done. Lastly, a backpack to contain these things, some water and food would be a good idea.
On the other hand, when rappelling from a cliff, wear according to the weather, but prioritize comfort. Also, carry a pack for your gear, water, and food. If you are carrying a lot of climbing and rappelling ropes, carry a rope bag to coil your ropes neatly.
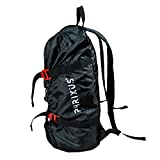
- Nylon
- CLASSIC ROPE BAG: PHRIXUS rope bag is used to place climbing ropes and other necessary accessories. This is a large-capacity bag with a top zippered pocket. Mesh top lets you know items inside at one glance.
- DURABLE MATERIAL: Constructed of rip-stop 500D Oxford Fabric, water-resistant, stain-resistant, durable and lightweight, our rope bag can protect and carry ropes for your mountaineering or other outdoor activities.
Last update on 2023-01-03 // Source: Amazon Affiliates
What is the difference between a rappel and a belay?
Belaying is the act of catching your climbing partner when you’re both connected to the same rope. On the other hand, rappelling is lowering yourself using a rope and other gear. Typically, belaying comes in handy during alpine or climbing adventures, while rappelling is popular for canyoneering and caving.
Is rock climbing the same as rappelling?
No, rock climbing is not the same as rappelling. Rock climbing is a sport involving ascending rock structures without a rope, though rock climbers frequently apply rappelling to lower themselves from these rock structures. So, they might not be the same, but they’re connected.
Is abseiling (rappelling) an effective workout?
Yes, abseiling (rappelling) is an effective workout. Rappelling is an outdoor activity that works on all the muscles in the body, including the glutes, shoulders, quads, forearms, and lats. Plus, climbing and rappelling an excellent way to burn excess calories fast and enhance your grip strength.
How do I rappel if I don’t have a belay device?
Rappelling without a belay device is possible, and below we have listed the two most common techniques to rappel without a belay device.
- With a munter hitch, a climbing rope, and one lockable carabiner.
- With a double carabiner brake abseil using four carabiners.
| Preview | Product | Rating | |
|---|---|---|---|

|
Black Diamond Hotforge Screwgate 3 Pack, Gray | 1,047 Reviews | Check Current Price |
|
Favofit Carabiner Clips, 4 Pack, 12KN (2697 lbs) Heavy Duty Caribeaners for Camping, Hiking, Outdoor... | 5,302 Reviews | Check Current Price |
|
Black Diamond Hotforge Screwgate 3 Pack, Black | 1,046 Reviews | Check Current Price |
Last update on 2023-01-29 // Source: Amazon Affiliates
Is abseiling (rappelling) a common hobby?
Yes, abseiling is common among agile hikers and climbers looking for a fascinating challenge. If you’ve never rappelled before, you should start learning how to rappel in a climbing gym and proceed to sharpen your skills from there.
What do I require to rappel safely?
To begin abseiling safely, you will require sufficient rappelling skills and knowledge of making the knots and moving the rope via the belay device. Moreover, you should have all the necessary climbing equipment.
Essentially, rappelling gear will be part of your climbing gear since it also comes in handy when climbing. Here are some of the important gear you will require to rappel safely.
- A rope
- Belay device
- Harness
- Helmet
- Carabiners
- Top anchor
Is there a difference between abseiling and rappelling?
No. abseiling and rappelling are synonyms. They are both defined as the process of lowering a vertical wall or cliff with the use of a belay gadget and rope. Abseil and rappel are utilized interchangeably in many countries like New Zealand and Canada, thus showing the synonymity between these two terms.
How do I ensure that I abseil (rappel) safely?
Rappelling safely is every climber’s objective. There are several things to do to avoid injury. Here is a list of some of the crucial tips to remember to abseil safely.
- Make sure to make an extra knot to establish a brake, otherwise called a “prusik knot.”
- Learn how to choose a prusik cord and how to use a prusik knot when rappelling.
- Select a climbing partner who is more experienced than you, probably a professional climber, someone you can trust such that none of you are distracted when tying your belay gadgets.
- Make sure to fasten knots at the ends of both ropes, as it prevents either of you from sliding off.
- Clear communication between you and your partner is vital.
- GM CLIMBING 30” 8mm pre-sewn eye-to-eye prusik cord is made of double braid 8mm polyester rope which features excellent abrasion-resistance, high strength and long lasting performance.
- Supple in handling, flexible and easy to tie knots. Simple While Powerful! You could find it an amazing gear in 100 outdoor applications.
- Where you need a Bachmann knot or a French knot, an eye-to-eye prusik cord will do it well to be a great help for you. The ends of loop / cord are sewn professionally by machine with high strength thread and tightly covered by a heat shrink plastic sheath to guarantee safety in a further consideration.
Last update on 2023-01-31 // Source: Amazon Affiliates
NB: While these four tips will come in handy, remember that they are not substitutes for proper training. These are helpful reminders to ensure you’re as safe as possible while doing what you love. Similarly, make sure your rappelling skills are on point.
What is the most suitable way to set up my rappel?
Once the ropes are securely connected via the rappelling anchor, you’re supposed to be attached directly to the anchor with your anchor tether and unfastened from the rope. Attach the rappel gadget to the belay loop using a lockable carabiner, tug several feet of rope from both strands, then lock the carabiner.
Are there any slip-ups when rappelling?
Yes. While rappelling is a straightforward concept, it can be tricky when practicing, particularly if you’re a beginner. Mishaps can be made, accidents could happen, and unfortunately, they’re frequently fatal. For this reason, we have included an easy-to-understand guide on how to rappel so that you can avoid mistakes.
What is the most common rappelling technique in Australia?
The most common rappelling technique in Australia is the Australian rappel. We have reviewed the Australian rappel and how to go about it.
It involves lowering with your face pointing to the bottom and the rope tied to the waist. Again, your legs should be against the cliff or wall you’re rappelling. All the same, this technique is better suited for professionals.
What are the downsides of standard abseiling (rappelling)?
Even though standard abseiling is ideal for many circumstances, it has several downsides. Standard rappels can be quite challenging to perform if you have a backpack. Plus, they tend to be slower compared to other abseiling techniques. Oddly, the primary risk with standard rappel is due to their simplicity.
What benefits does rappelling present?
Besides being fun, rappelling presents a handful of benefits listed below.
- Improved eye-hand coordination.
- It is an excellent workout.
- Perfect for people looking for a challenge.
- Enhanced social and observation skills.
- Building certainty.
- It is thrilling and helps you explore the outdoors uniquely.
- It helps you push your limits.
- The incredible heights are quite fascinating.
- Learning to use the specialized gear.
Do I have to be fit to rappel?
Rappelling has no weight or age limit for the participants. On the other hand, it would be best to be fit and healthy. Hence, if you have a medical condition, you’ll be required to consult your doctor. Again, you should present a doctor’s approval note confirming that you’re good to go.
In Conclusion
Rappelling is a fun activity that you can partake in independently or when canyoneering, caving, rock climbing, and mountaineering. However, you must learn how to rappel and practice often to improve your skills. Again, be careful and make sure you double-check everything before you begin rappelling.
While rappelling accidents are rare, they are fatal. Also, it would be best to have a professional instructor until you’re ready to do it without supervision.
So, there it is, a complete guide on how to rappel and amp your rappelling skills. Nevertheless, reading this guide is not an alternative to practicing. Go to the local climbing gym, begin practicing and seek advice from the experts.
Related Articles:
The rankings on rappellingequipment.com are curated to save you time by aggregating the best reviewed products from the most reputable companies. We may receive a commission if you buy something using a link on this page.